
|
"The lesson will be taught in due time, Aloy. Until then, we wait." This article contains heavy spoilers. Read ahead with caution.
|
- "That machine looks like it could carry a mountain. Or smash its way through one."
- ―Aloy, upon sighting a Behemoth
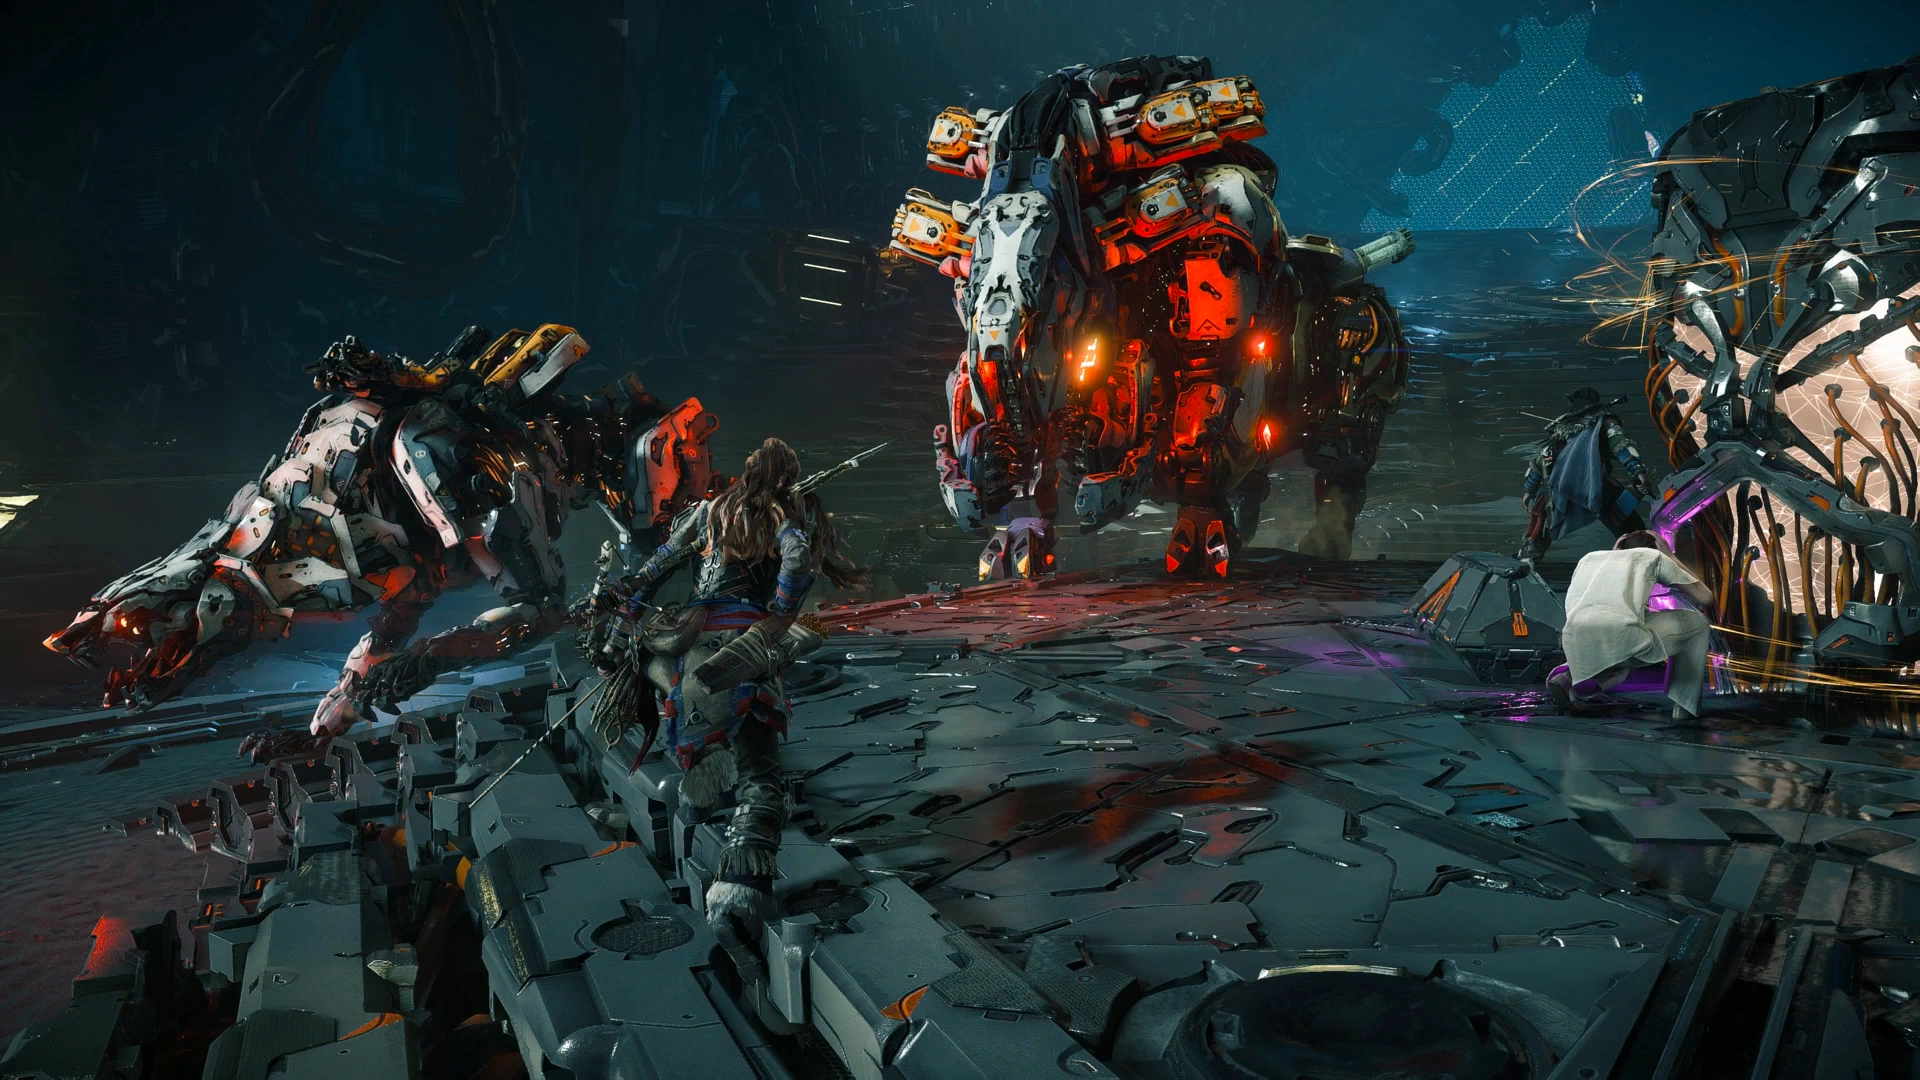
The Behemoth is a recurring Transport Class machine in the Horizon series, first appearing in Horizon Zero Dawn, and returning in The Frozen Wilds, Horizon Forbidden West, and Horizon Hunters Gathering.
History
Development
Behmoths were designed by Zero Dawn's governing artificial intelligence GAIA as an acquisition machine. It collects resources using its anti-gravity technology and storing them in a container on its underside.
Pre-Derangement
At this stage, Behemoths were docile and skittish, tending to run away from humans as they would often hunt machines for parts and resources. Behemoths can be found in the Sundom, the Cut and the southern Clan Lands.
Sometime during reign of Sun-King Khuvadin, Ranan or Nahasis, records in Sunfall show that the men of the city once fought a dangerous stampede of Behemoths in the Long Burn.[1]
The Derangement
At the advent of the Derangement, almost all machines started becoming increasingly aggressive towards humans, including the Behemoths. By the time of Aloy reaching adulthood, Behemoths will attack any humans they see.
Behemoths were a favorite machine of Sun-King Jiran to use in blood sacrifice as appeasement to the Sun in his deluded effort to end the Derangement. The victims were herded into an arena known as the Sun-Ring, and Behemoths and other machines were loosed in the arena to kill them, while hundreds of spectators watched.
Horizon Zero Dawn
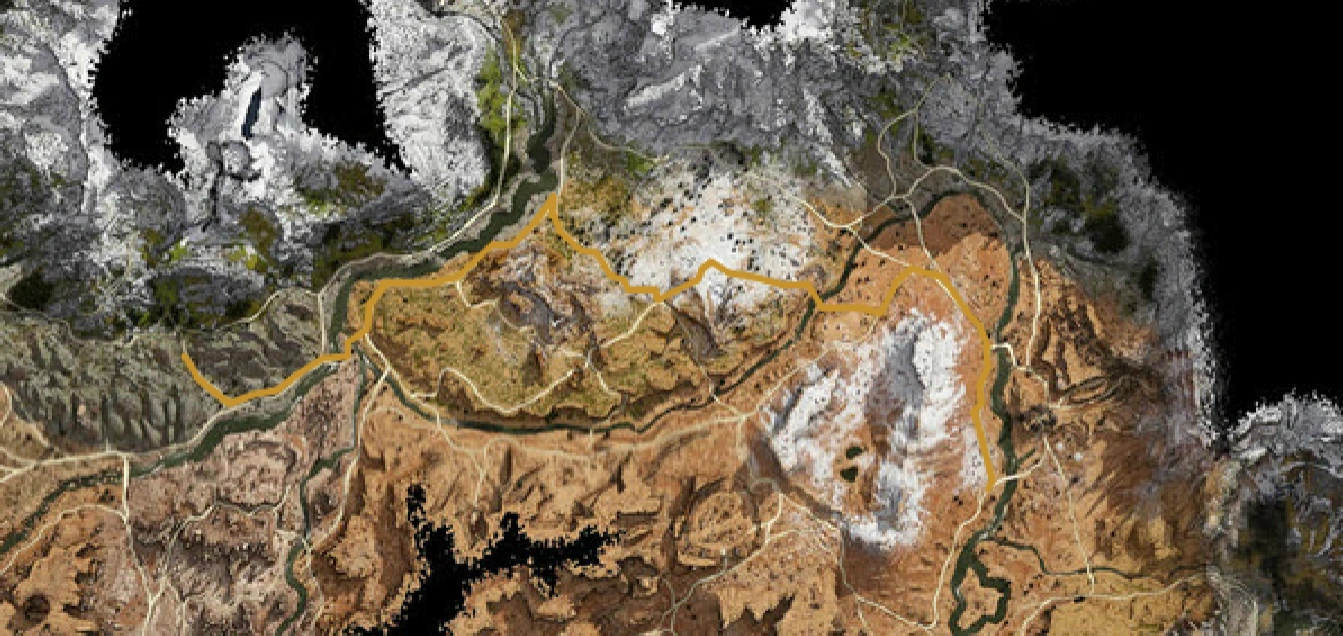
The Behemoth convoy path in Horizon Zero Dawn.
When Aloy infiltrated Cauldron XI and overrode its core, she gained access to the information needed to override Behemoths.
One of the Behemoths attacking Sunstone Rock.[2]
The Oseram murderer Rasgrund used a machine lure to summon two Behemoths to the Carja prison Sunstone Rock, from which he had escaped, to destroy the prison and kill Warden Janeva. Aloy happened upon the attack, and helped kill the Behemoths.[2]
Aloy helped two Oseram hunters, Beladga and Jorgriz, acquire Behemoth Cables for use as cannon fuses by waylaying and killing a convoy of three Behemoths and accompanying Shell-Walkers.[3]
When was ambushed and captured in the Zero Dawn Project Facility by Helis, Aloy was thrown unarmed into the Sun-Ring in Sunfall with a Behemoth. Helis used Corruptors to corrupt the Behemoth, increasing its power and aggressiveness, then had it loosed to kill her. However, Aloy turned the machine’s strength to her advantage by goading it into knocking down support pillars that held up a platform on which her equipment lay. Reacquiring her equipment, she then destroyed the corrupted Behemoth.[4]
With the spreading of corruption in the Rustwash, two Behemoths became corrupted. They were subsequently destroyed by Aloy.
Horizon Zero Dawn: The Frozen Wilds
A daemonic Behemoth was among the machines Aloy, Aratak and Ourea either destroyed or snuck past during their expedition towards Cauldron EPSILON.[5]
Sometime between Horizon Zero Dawn and Horizon Forbidden West
While the circumstances of how are unknown, Aloy somehow lost the ability to override Behemoths, as well as most other machines.
Horizon Forbidden West

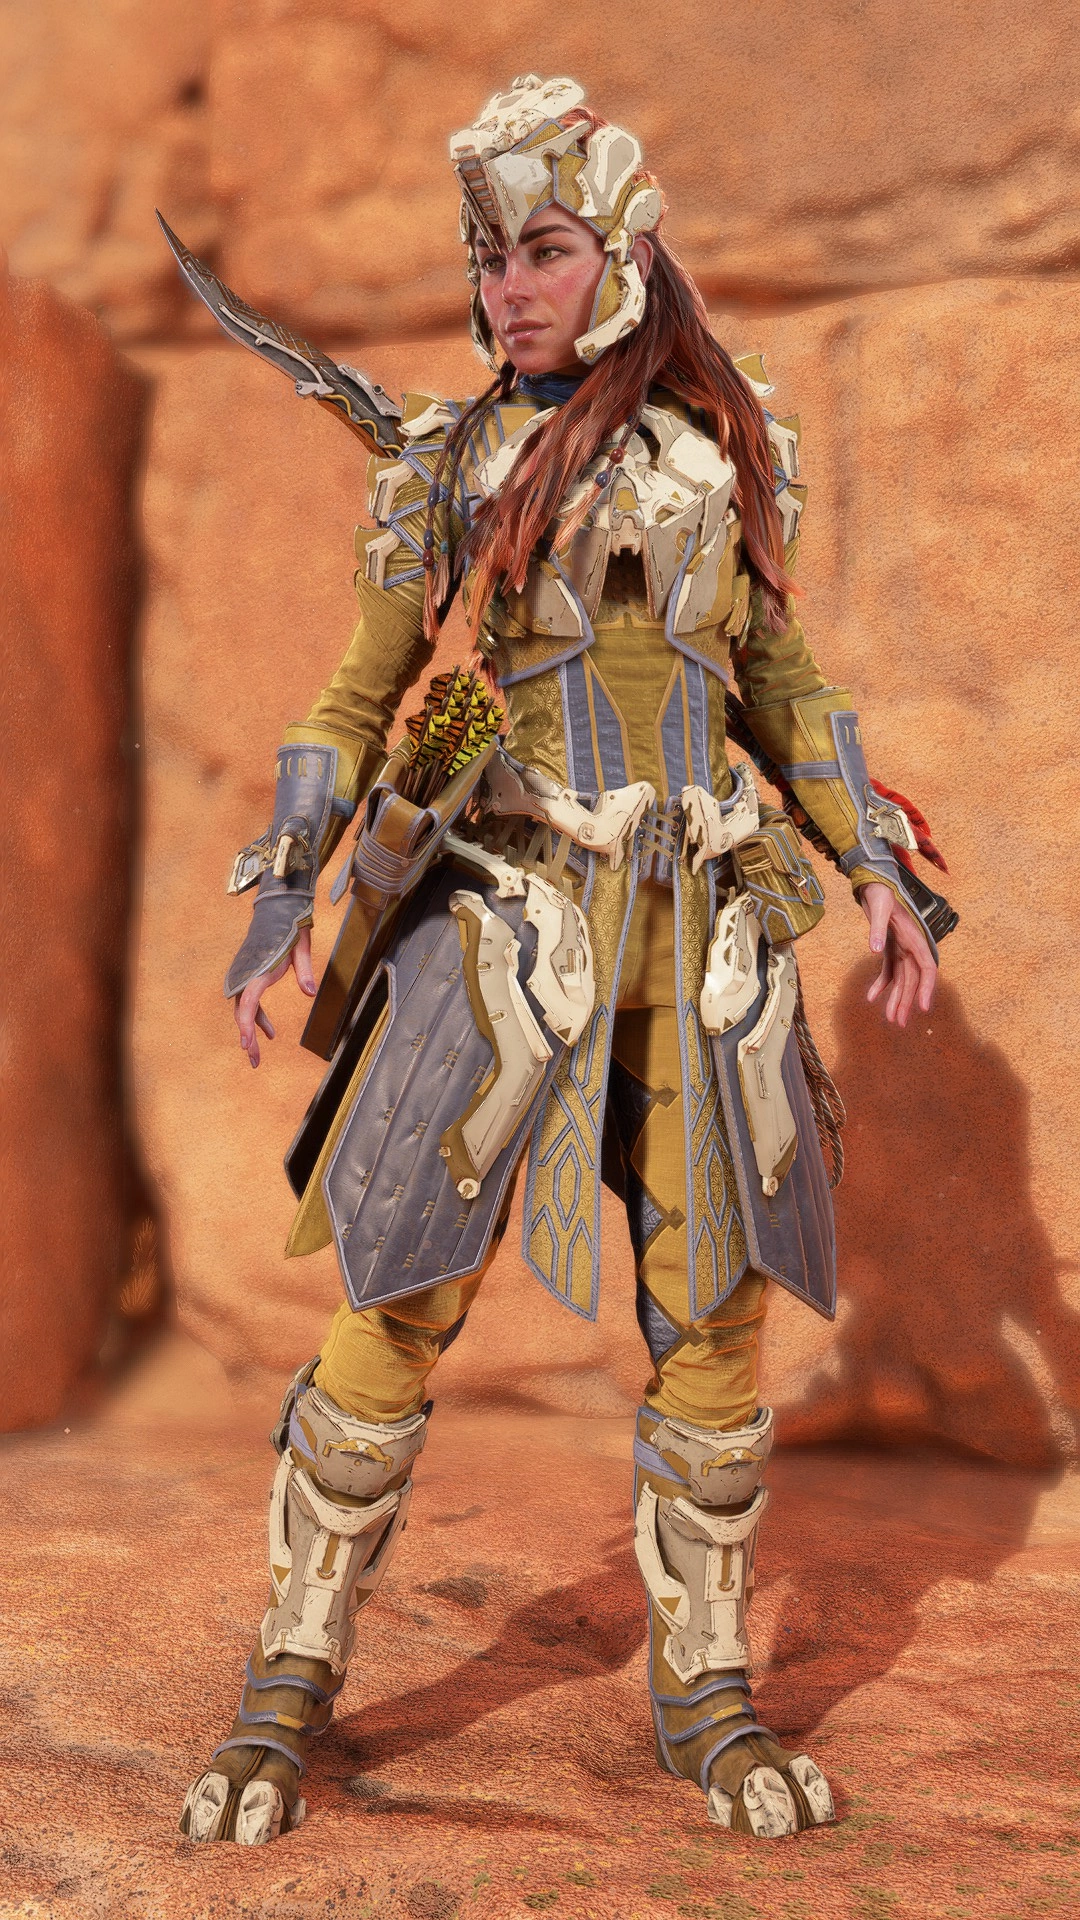
The Carja Behemoth Elite.
The Carja Behemoth Elite was inspired by Behemoths,[6] while the Carja Behemoth Trapper is made of Behemoth components.[7]
A new model of Behemoth, the Apex Behemoth, was released into the wilds alongside their regular counterpart sometime after Apex machines were first released from Repair-Bay TAU.[8]
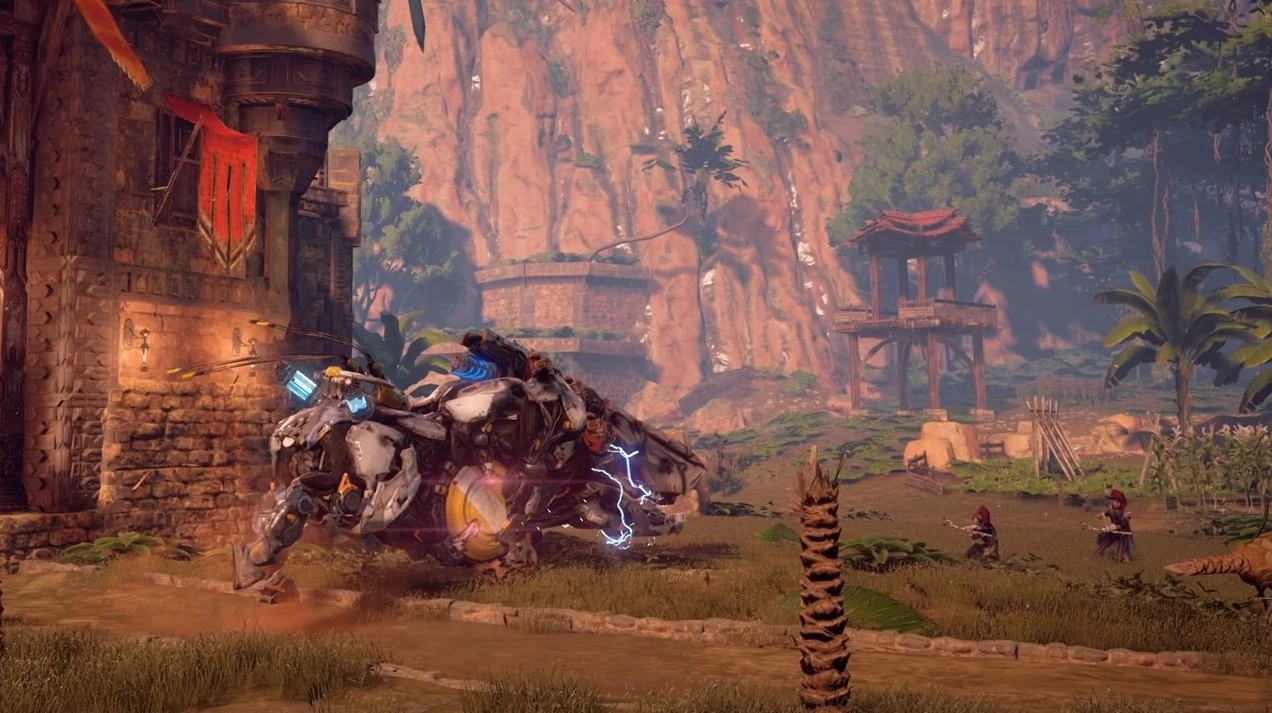
A Behemoth was overridden by Regalla's rebels to use to destroy Fall's Edge. Kavvoh defected from the rebels to warn the Tenakth, which Aloy and Arokkeh found to be true. Together, they worked together to destroy the Behemoth, saving Fall's Edge from destruction.[9]
A herd of a Behemoth and two Spikesnouts in Horizon Forbidden West.[10]
Wanting to use Behemoth Salvage to build a set of armor, Danur hired Aloy with a contract to hunt a herd with a Behemoth and Spikesnouts and retrieve the salvage for him, which Aloy successfully did.[10]
When Aloy infiltrated Cauldron CHI and overrode its core, she regained access to the information needed to override Behemoth.[11]
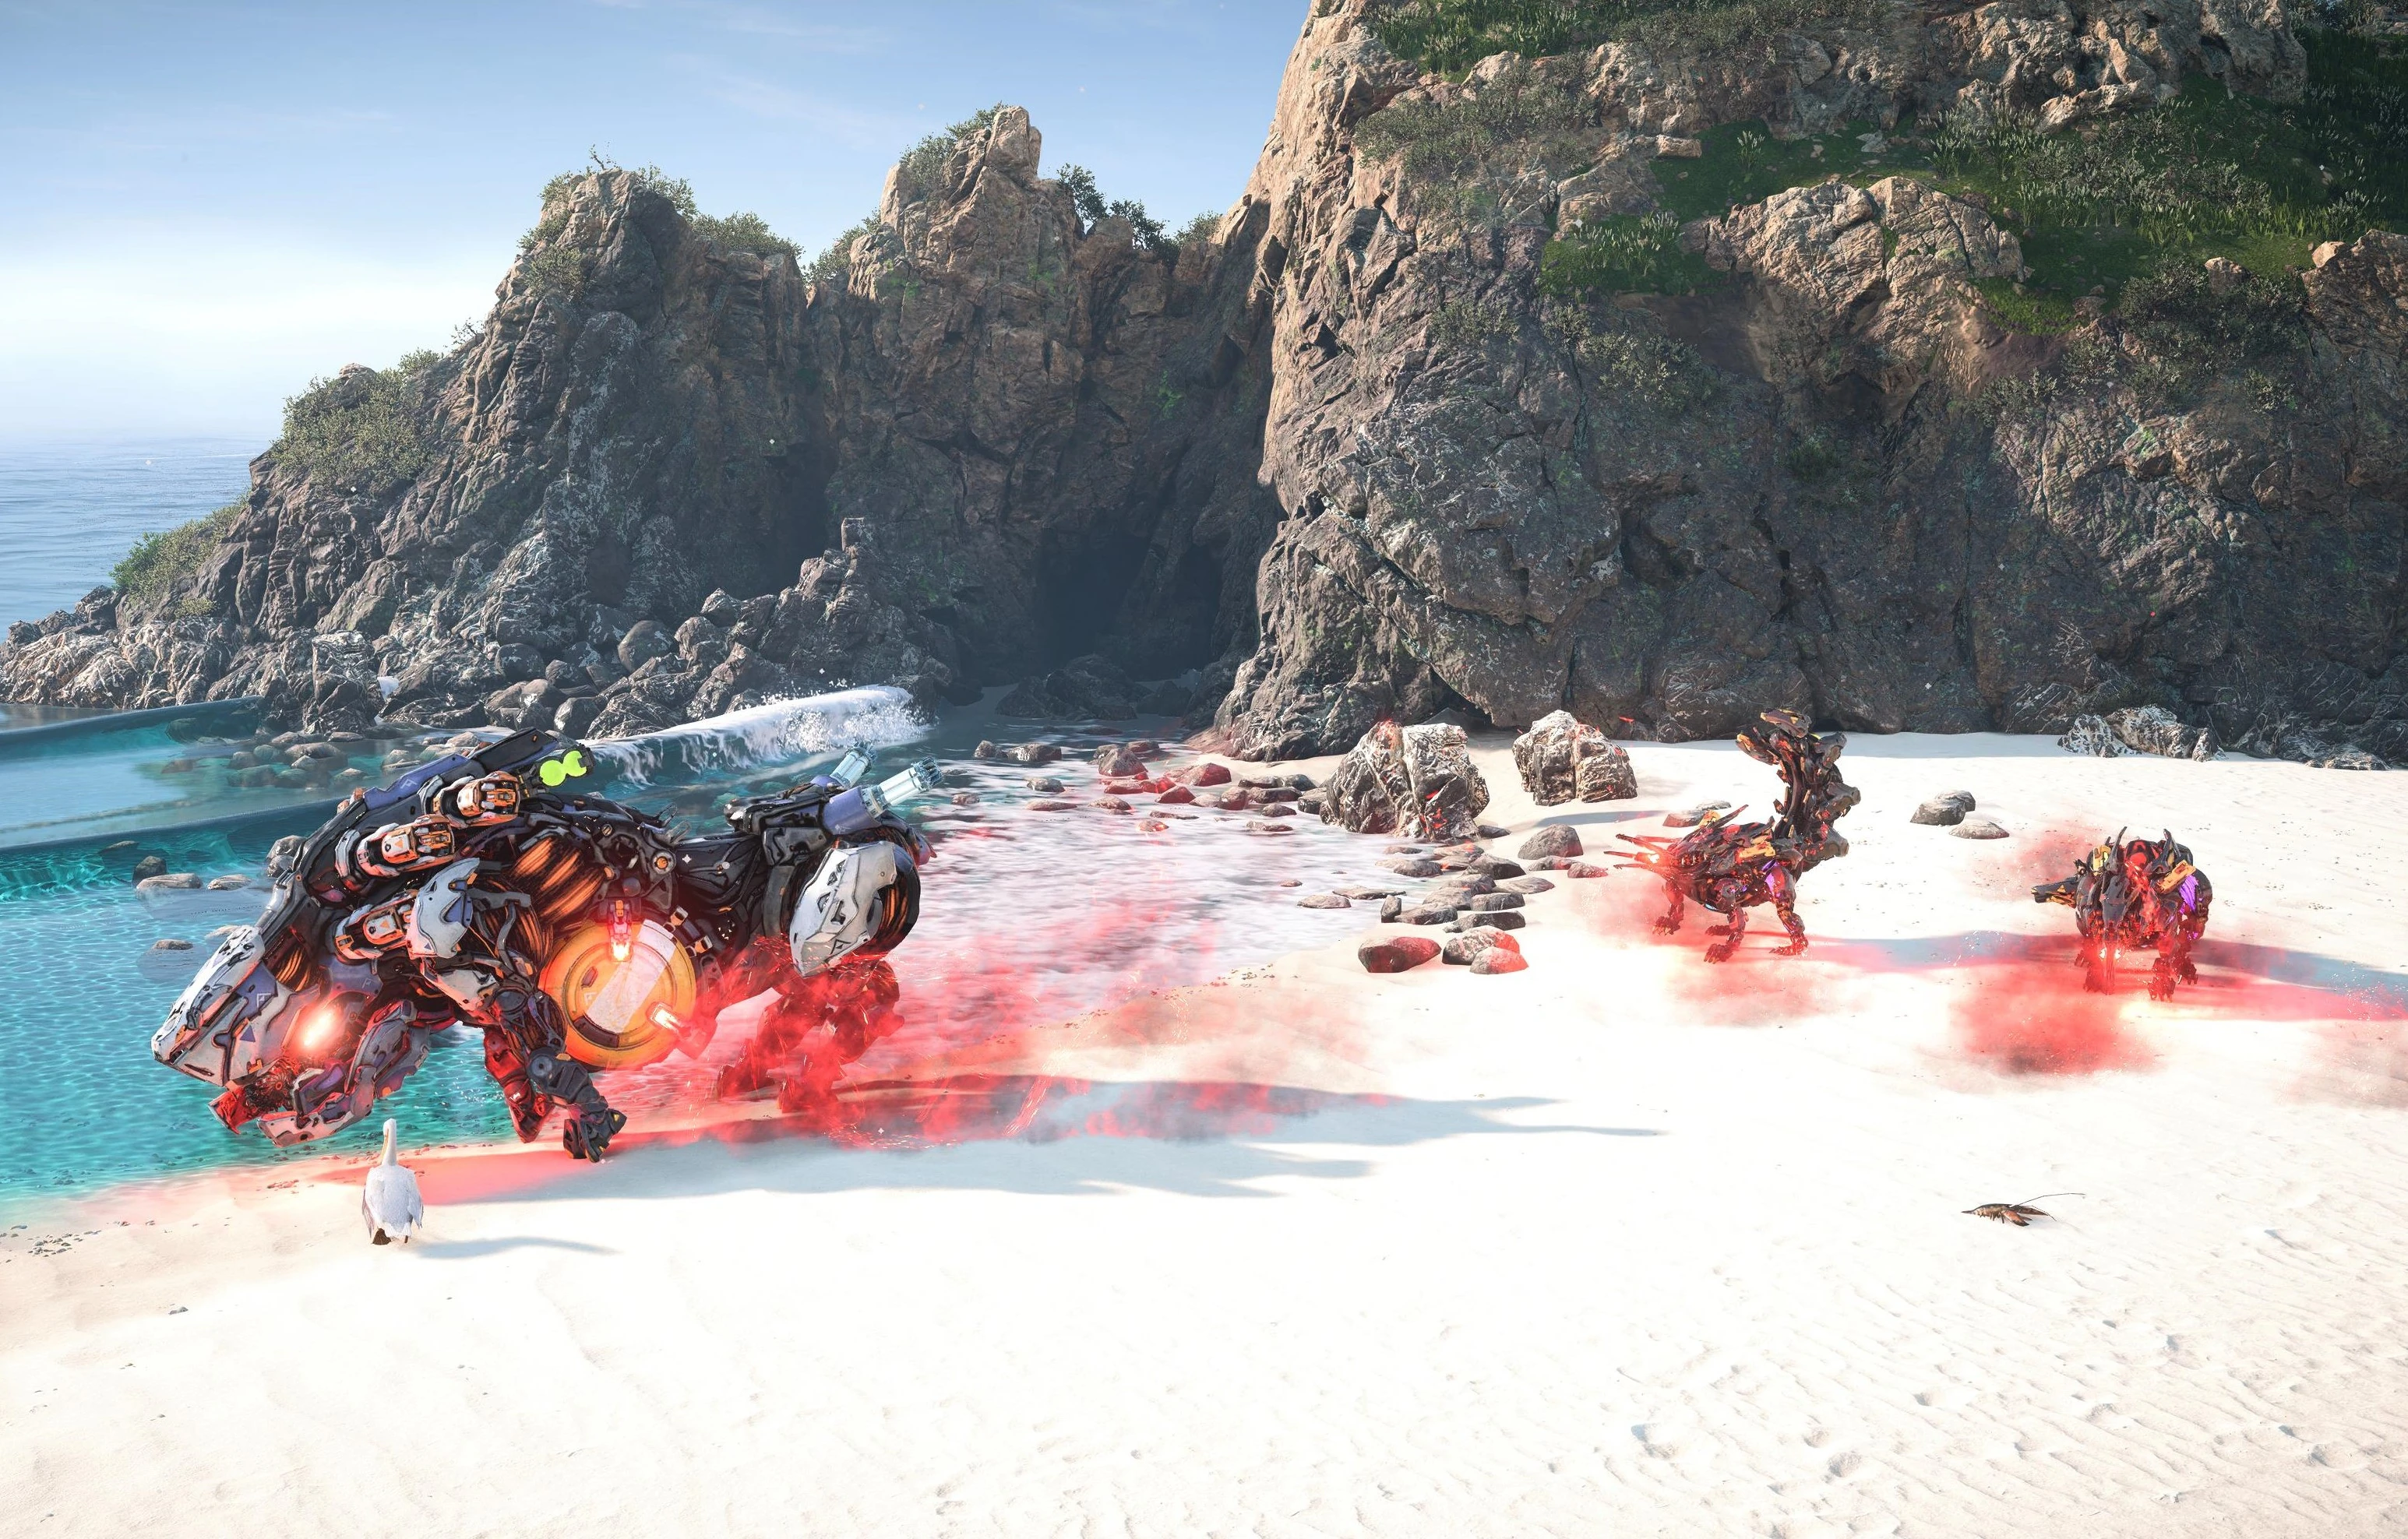
A Behemoth in Cauldron GEMINI.[12]
A Behemoth was among the machines HEPHAESTUS sent after Aloy, Varl and Beta while trying to escape them in Cauldron GEMINI, but Aloy and Varl were able to destroy them all.[12]
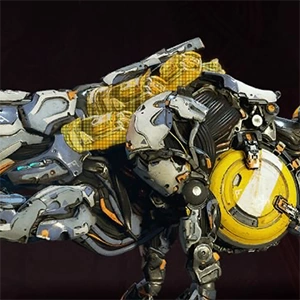
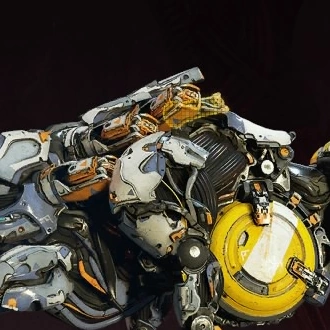
Appearance
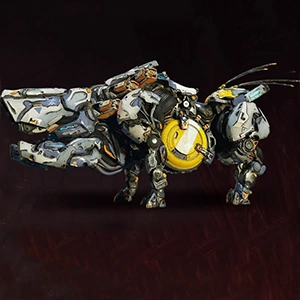
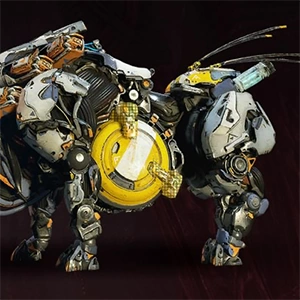
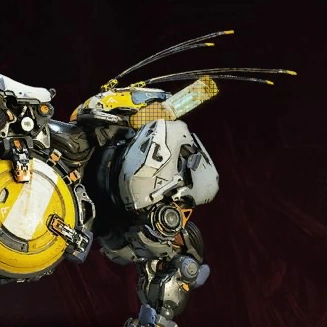
The Behemoth’s huge chassis has some resemblance to the body of a rhinoceros. It is speculated by some fans that it is based on some ancestor or relative of modern rhinos, such as an Amynodont. Its head is mostly composed of a very large pyramidal snout. Its jaws consist of a pair of mandibles similar to those of a Thunderjaw, An optical sensor array is located on each side of the snout, near the mandibles. Between the mandibles is a pair of rotary tools whose primary purpose is unknown, but which it can use in attacks. On each side of its very large neck are three anti-gravity generators called force loaders. Its belly has a large longitudinal circular space into which a circular cargo container fits vertically, locked in place by clamps. Between its haunches is an antenna array, and on each haunch is a Chillwater canister. On the back of its neck sits a single power cell.
Behavior
Behemoths are almost exclusively found walking in convoys consisting of one Behemoth and two Longlegs. The only known Behemoth site is located to the far north of Meridian in the Carja Sundom, along the route that leads to the Old Ones ruin known as Maker’s End. Here three Behemoths mill about, along with two Longlegs. It may be surmised that the Behemoths seen in convoys come from that site and left to go on resource transport convoys between cauldrons. This task occupies them constantly, and hence they do not return.
Abilities
A Behemoth’s most potent attacks stem from its anti-gravity ability. It can manipulate gravity to employ extremely powerful rock-hurling melee attacks. Additionally, it can use its weight and physical power to generate very damaging seismic shockwaves, and hurl rock shrapnel from its mouth using the rotary tools mounted in it. Its most basic attack is a charge that inflicts severe damage due to sheer momentum. This momentum is due to the machine’s huge mass and the velocity of its charge; Behemoths normally ambulate with a slow, plodding gait, but are capable of running with surprising speed when necessary.
Weaknesses
A Behemoth relies on its force loaders for its anti-gravity attacks. Their destruction or removal via pneumatic concussion weapons such as the Tearblaster or ammunition such as Tearblast Arrows therefore disables these attacks. Strikes on its Chillwater canisters with Freeze Arrows cause a damaging Freeze elemental explosion and induces a Freeze state, which makes the Behemoth much more susceptible to damage. Striking the power cell with a Shock Arrow releases a shock elemental explosion and stuns the machine.
Attacks
Horizon Zero Dawn
| Name | Damage Type | Primary Damage | Secondary Damage | Trigger Range | Description |
|---|---|---|---|---|---|
| Charge | Melee | 300 | - | 22m - 80m | Runs at and rams enemy |
| Gravity Boulder Throw | Projectile | 250 | - | 10m - 45m | Uses force loaders to lift and hurl single boulder at enemy |
| Gravity Purge | Projectile | 200 area | 150 per rock | 0m - 9.5m | Uses force loaders to lift a storm of boulders around itself and hurl it over a large radius |
| Grinding Shrapnel Blast | Projectile | 35 per hit | - | 8m - 25m | Uses rotary tools in its mouth to generate and hurl rock shrapnel at enemy |
| Quake Smash | Melee | 250 | - | 1m - 15m (moving) 15m - 22m (standing) |
Rears up and smashes down, producing forward-moving seismic shockwave |
Horizon Forbidden West
| Name | Windup Time | Damage | Trigger Range | Description |
|---|---|---|---|---|
| Grinding Shrapnel Blast | Short | 35 Ranged | 8m - 33m | Lowers grinder jaws into ground and spins them to fire rock shrapnel. |
| Gravity Boulder Throw | Long | 314 Ranged
|
10m - 55m | Uses Force Loaders to form boulder to hurl at target. Cancels into Quake Smash if target moves into close range while boulder is forming. |
| Gravity Purge | Very Long | Buildup Area: 100 Ranged, Blast Area: 440 Ranged Rock Projectiles: 220 Melee |
0m - 9.5m | Uses Force Loaders to surround itself with rocks, then unleashes a blast that sends them flying in all directions. |
| Charge | Very Short | 275 Melee
|
22m - 102m | Charges at full speed towards target while swinging head from side to side.
Attack disabled when Slowed. |
| Quake Smash | Medium | 275 Melee
|
15m - 22m | Rises on hind legs and smashes down with ram, producing a Tremor effect and explosion of debris beyond the point of impact.
Desperation Attack |
Components
Horizon Zero Dawn
| Image | Component | Information | Weakness | Strength |
|---|---|---|---|---|
|
Body | Hard outer casing to protect synthetic muscle and operational systems. | None | |
|
Crate Holders | Destroying this component will detach the cargo container. | All | None |
|
Freeze Canister | Shooting these canisters with Freeze arrows will trigger an elemental explosion. Chillwater can be looted from this canister. | None | |
|
Force Loader | Destroying these components disables the lifting attacks. Exploding a force loader will send Aloy flying several meters away. | None | |
|
Power Cell | Shooting this component with Shock arrows will trigger an elemental explosion. Sparker resource can be looted from this component. | None |
Horizon Forbidden West
| Image | Name | Variant | Description | Attributes |
|---|---|---|---|---|
| Body | All | Hard outer casing to protect synthetic muscle and operational systems. | None | |
| Force Loader | All | Anti-gravity system used to pick up heavy cargo and hurl objects at enemies. Detach or destroy to disable lifting attacks. |
| |
| Acid Canister | Standard | Metalbite storage. Tear off to collect this resource or shoot with an Acid Arrow to detonate. |
| |
| Blaze Canister | Apex | Blaze storage. Tear off to collect this resource or shoot with a Fire Arrow to detonate. |
| |
| Cargo Holders | All | Sturdy cargo clamps. Detach or destroy to collect resources from the cargo container. |
| |
| Antenna | All | Signal transmitter used to call in machine reinforcements. |
| |
| Chillwater Canister | Standard | Chillwater storage. Tear off to collect this resource or shoot with a Frost Arrow to detonate. |
| |
| Glowblast Canister | Apex | Glowblast storage. Tear off to collect this resource or shoot with a Plasma Arrow to detonate. |
|
Loot
Horizon Zero Dawn
.png)
Horizon Forbidden West
Body
- Crystal Braiding (100%)
- Metal Shards (100%)
- Large Machine Core (70%)
- Behemoth Circulator (69%)
- Behemoth Primary Nerve (62%)
- Machine Muscle (46%)
- Metal Bone (29%)
- Luminous Brainstem (28%)
- Braided Wire (21%)
- Sturdy Hardplate (10%)
Force Loader
- Behemoth Force Loader (100%)
Acid Canister
- Metalbite (100%)
Cargo Holder
- None
Antenna
- Braided Wire (67%)
- Sturdy Hardplate (34%)
- Behemoth Primary Nerve (10%)
Chillwater Canister
- Chillwater (100%)
Body
- Metal Shards (100%)
- Crystal Braiding (100%)
- Apex Behemoth Heart (100%)
- Luminous Brainstem (100%)
- Behemoth Circulator (69%)
- Large Machine Core (69%)
- Behemoth Primary Nerve (62%)
- Volatile Sludge (50%)
- Machine Muscle (45%)
- Metal Bone (28%)
- Braided Wire (21%)
- Sturdy Hardplate (11%)
Force Loader
- Behemoth Force Loader (100%)
Blaze Canister
- Blaze (100%)
Cargo Holder
- None
Antenna
- Braided Wire (67%)
- Sturdy Hardplate (34%)
- Behemoth Primary Nerve (11%)
Glowblast Canister
- Glowblast (100%)
Variants
| Variant | Weak Vs. | Strong Vs. |
|---|---|---|
| Behemoth |
|
|
| Apex Behemoth |
|
|
Gallery
- See Behemoth/Gallery
Trivia
- The Behemoth's naming convention is unique in that it is neither an active agent like Strider or Ravager nor a compound noun like Snapmaw or Glinthawk. Additionally, it is the only machine other than the Metal Devil to have a name based in mythology.
- Like the Shell-Walker, the Behemoth's cargo container can be destroyed if Aloy is not careful. If it is destroyed, no loot can be gained from it.
- During development, the Behemoth was referred to as the Cargo-Rhino.[13]
- Ben McCaw imagines that the Behemoth's gravity technology has nanotechnology involved within it.[14]
- The Behemoth is named after the mythical creature mentioned in the Book of Job, part of the Old Testament of the Bible.
References
- ↑ History of Sunfall
- ↑ 2.0 2.1 Sunstone Rock (Quest)
- ↑ Hammer and Steel
- ↑ The Terror of the Sun
- ↑ Firebreak (Quest)
- ↑ Description for the Carja Behemoth Elite.
- ↑ Description for the Carja Behemoth Trapper.
- ↑ The Dying Lands
- ↑ Blood for Blood
- ↑ 10.0 10.1 Reinforced Components
- ↑ Cauldron CHI
- ↑ 12.0 12.1 Gemini
- ↑ https://youtu.be/4FAXv2H-VUA, 7:24
- ↑ Horizon GAIA Cast | Episode 2 - Events of the 21st Century; 8:21
| Machines | ||
|---|---|---|
| Acquisition Class | ||
| Chariot | ||
| Combat Class | ||
| Communications Class | ||
| Recon Class | ||
| Transport Class | ||
| Unknown Class | Bloodbeak - | |
| Variants | Apex Machine - Corrupted Machine - Daemonic Machine | |